Want to know how to go live on Facebook Live? Let’s get that camera rolling! If you’ve been considering using Facebook Live streaming videos to boost your promotions, you’re headed in the right direction.
With over 3 billion active users each month, Facebook Live stands as one of the best platforms for connecting with audiences in real-time.
It has become a popular social channel for brands, influencers, and individuals who want to build communities and create meaningful interactions with viewers, all while boosting their visibility.
According to Resources, the U.S. livestreaming market is expected to grow from around $90 billion in 2024 to nearly $560 billion by 2032. In the United States, Facebook live-streaming is the second most popular live-streaming platform.

So, what’s the starting point?
Just tapping “Go Live” won’t make the most of Facebook Live’s potential; consider using streaming software for better results. It’s important to know how to get ready, choose the right tools, and make your live sessions interesting and professional.
That is where this guide comes in handy. It covers everything you need to get started with Facebook Live, whether you are using built-in features or adding tools like Livecaster to improve your stream.
Here’s what you’ll learn:
- What is Facebook Live streaming, and why is it valuable for connecting with your audience using the Facebook app?
- Tips for a productive Facebook Live session.
- Advice for Creating Captivating Facebook Live Streaming Events with Livecasters
What exactly is Facebook Live?
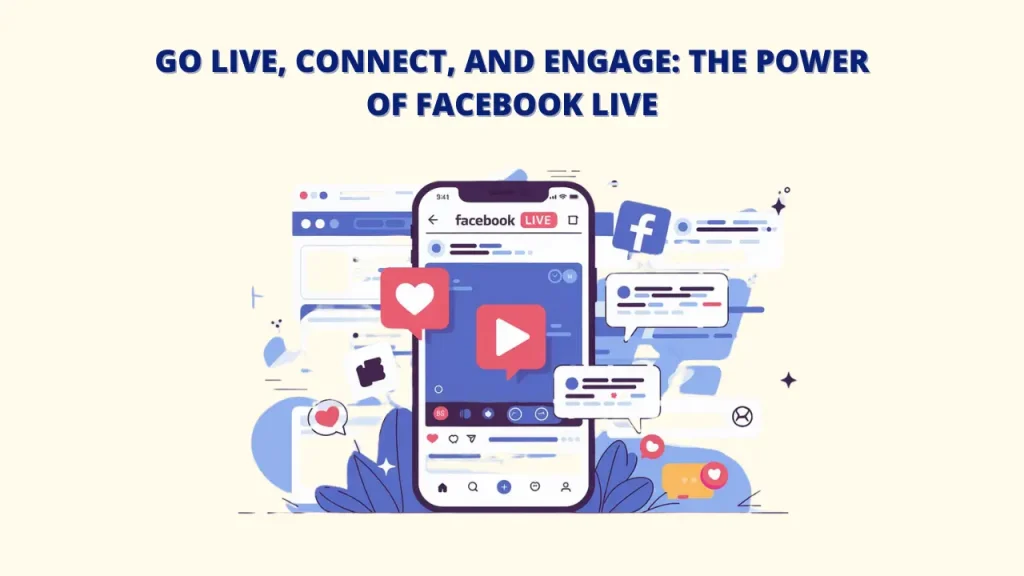
Facebook Live is a tool that allows you to stream live videos to a Facebook profile, page, or group. You can go live on Facebook Live using either your computer or the mobile app. The feature is free—all you need is a Facebook account.
Since its launch in 2016, Facebook Live streaming has allowed people, businesses, organizations, and public figures to share live videos directly with their friends and followers.
Advantages of Using Facebook Live Streaming
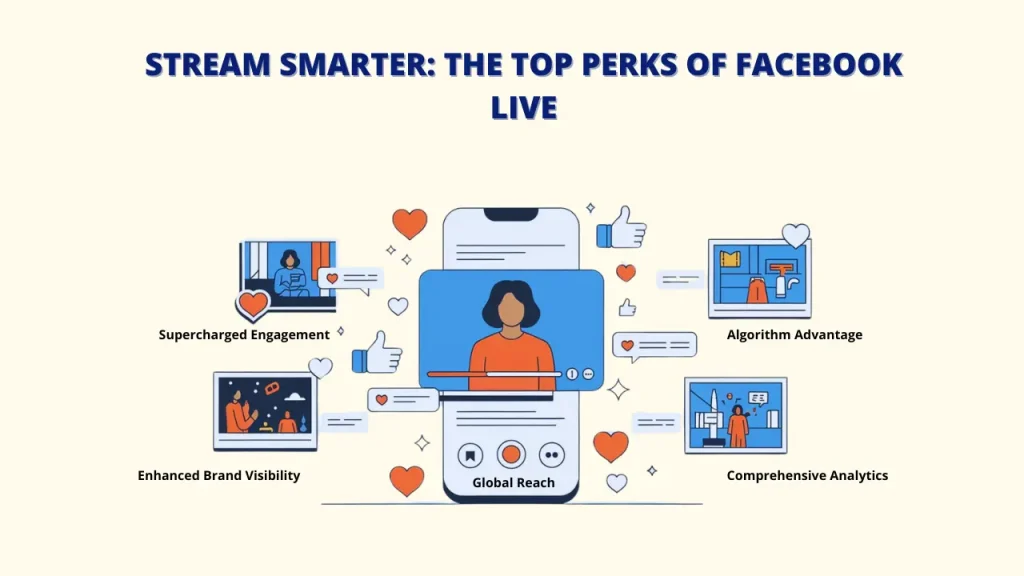
A. Supercharged Engagement
Live streaming opens up an instant, two-way conversation with your audience. Unlike pre-recorded videos, live streams let you answer comments and questions as they come in, creating a more genuine, engaging experience. With Livecaster, you can go live instantly or schedule your broadcasts in advance.
B. Enhanced Brand Visibility
Facebook’s live streaming algorithm favors live content, which helps your streams stand out more in followers’ feeds. Studies show that live videos get up to three times more engagement than pre-recorded ones, significantly boosting your brand’s visibility. With Livecaster, you can organize multiple videos for seamless streaming.
C. Algorithm Advantage
Facebook Live actively promotes live videos, sending alerts to your followers when you go live and featuring your stream in their news feed. This organic boost expands your reach without the need for extra ads. Livecaster 24×7 can help maximize your reach and engagement.
D. Comprehensive Analytics
Facebook Live provides thorough insights into your live streams, including:
- Peak viewers at one time
- Total views
- Average watch time
- Engagement data
- Viewer demographics can be analyzed through Facebook or Livecaster.
With Livecaster, you can monitor your livestream performance with comprehensive analytics, learn about audience engagement, and improve your approach.
E. Potential for global reach
With Facebook’s huge audience, your live content can reach viewers across the globe. This global access makes Facebook Live an unmatched tool for sharing content. Livecaster also lets you organize and sequence videos for smooth, efficient streaming.
Preparing for Your Live on Facebook Live Streaming
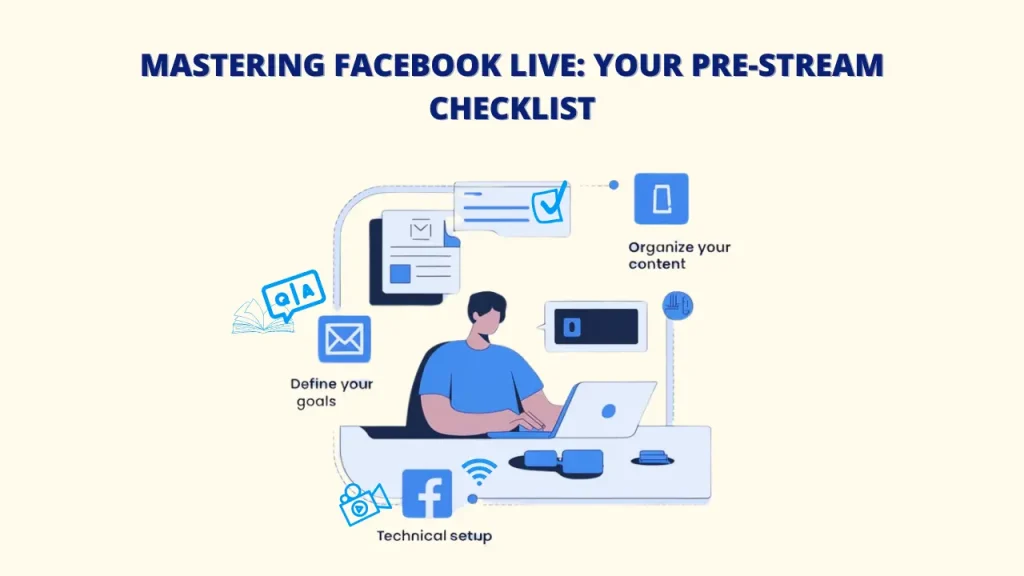
To make the most out of your Facebook Live, preparation is key.
Define Your Goals:
Choose what you want to achieve with your live session—whether it’s promoting a product, answering questions, or sharing a story. Clear goals make your content more valuable. With Livecaster, you can expand your reach, attract viewers, and strengthen your brand. Before going live, decide on your purpose, like:
- Product launches or demos
- Q&A sessions
- Behind-the-scenes insights
- Educational workshops
- Live event coverage
Organize Your Content:
Plan out your session to keep viewers engaged, starting with an introduction, covering main points, and ending with a conclusion.
- Make a clear outline for your stream to ensure a smooth experience when you go live on Facebook using the encoder.
- Prepare key points
- Add interactive moments
By scheduling your live stream in advance, Livecaster enables you to deliver content consistently even when you are not available.
Check the Technical Setup:
Ensure your equipment is ready for smooth streaming:
- Reliable internet (minimum 4 Mbps upload speed)
- Good-quality camera (smartphone or webcam)
- Clear Audio is crucial when you go live on Facebook using streaming software.
Tips to Improve Your Facebook Live Results
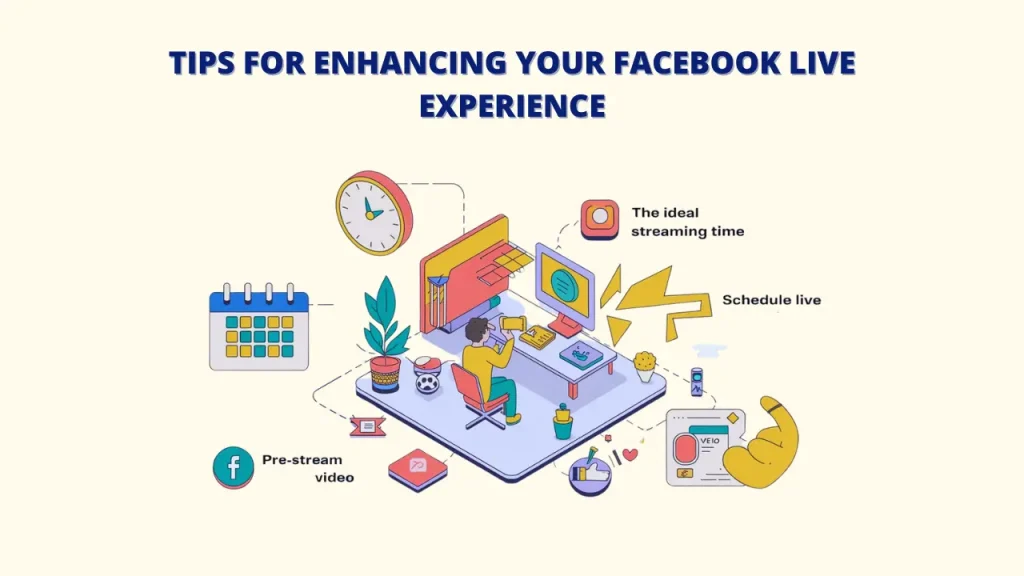
Use these pointers to increase your reach and engagement:
A. The Ideal Streaming Time:
Find out when your audience is most active to increase viewership. Livecaster can keep streams going with music, tutorials, news, or any content to help you build a loyal audience.
- Think about time zones if you have an international audience.
- Check your page insights to see when followers are most active
- Try a variety of times to determine what works best.
- Typically, weekdays between 1-3 PM get good results
B. Pre-stream marketing:
Let your followers know in advance when you’ll be live by posting on Facebook, Stories, and other platforms. You can also use Facebook’s “Schedule a Live Video” feature to notify your audience and create excitement.
- Schedule your live session at least a day ahead
- Build interest with teaser posts
- Use all channels (Stories, Groups, etc.)
- Send an email reminder to your subscribers
With a tool like Livecaster, you can go live even when you’re not available, keeping content consistent and your audience engaged.
How to Go Live on Facebook : Step-by-Step Guide
Step 1: First, download Livecaster on your computer.
Step 2: In this video, I will show you how to broadcast live on Facebook Live. First, you need to set up our Facebook broadcast settings. To do this, simply log into your Facebook account, and here you will find the option of live video.

Step 3: Click on it. You will be given two options to go live with Livecaster. Click on the go-live button.

Step 4: Now that you have opened your live streaming producer page, we need to change some default settings.

First, go to the advanced settings and enable the persistent stream key option, which will keep your streaming key unchanged even after the live.

Step 5: Next, select Settings from the menu on the left, then choose Stream. If it’s not already set, adjust the stream latency to auto.

You can also decide whether to post the video on your feed once the live session ends.

Step 6: You’ve now set up Facebook Live, allowing you to add any title and description you want for your live stream. Your Facebook producer settings are successfully configured for live streaming.

Step 7: Now, open Livecaster and add a Facebook channel by navigating to the channel section to set it up.

Step 8: Click on the Add channel button and enter the channel name you want to keep.

Then, copy the rtmp URL and key from the producer page.
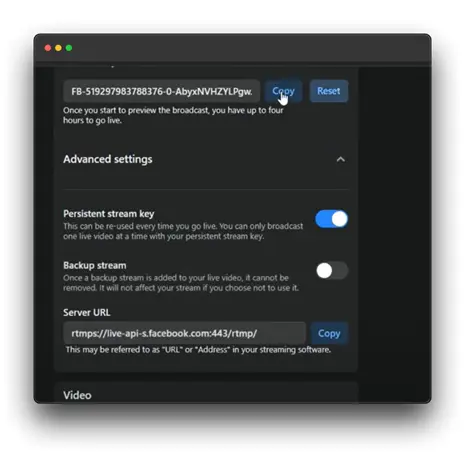
Here in the channel URL, you can give your Facebook profile link we will leave it blank.
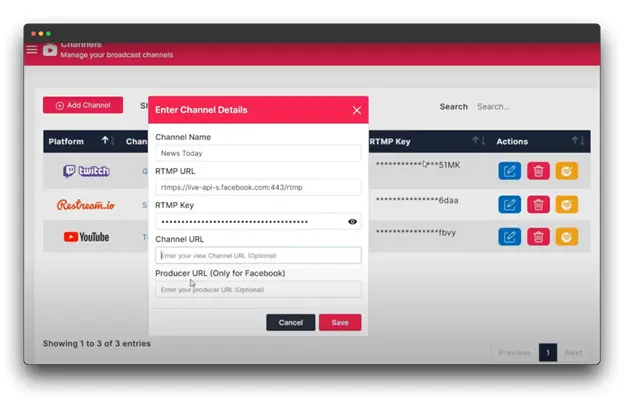
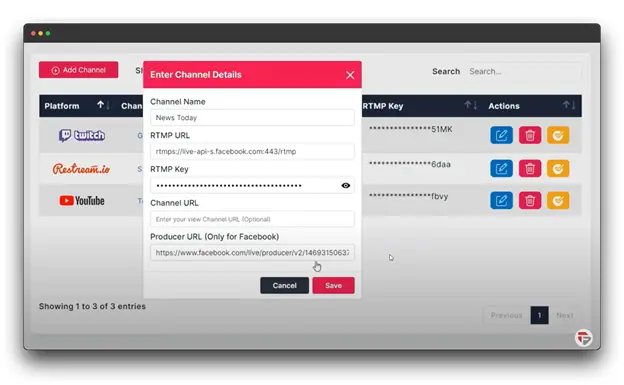
Next, you must include the link to your producer page in the producer URL. Just copy this link and paste it here.
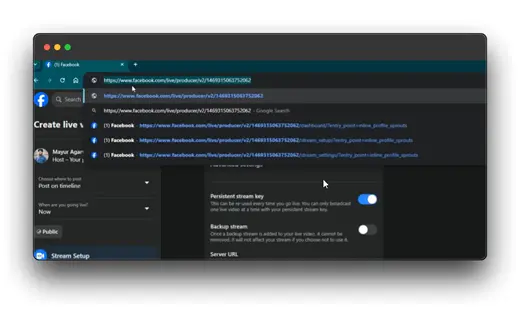
Remember to keep the link until this number, remove the other subfolders that are after that number in the URL, and then finally click save.
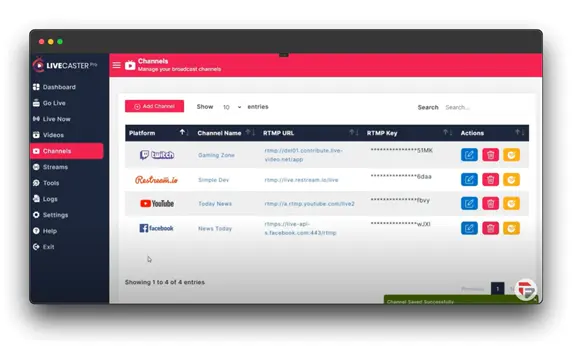
Your Facebook channel has been successfully added, and you’re now ready to go live.
Step 9: Go to Livecaster’s “go live” section to start streaming live.
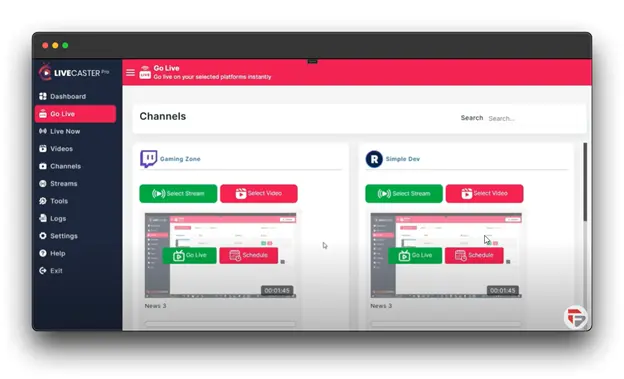
Step 10: You will notice that your Facebook channel has appeared here. Choose the video or stream you wish to use for your live broadcast.
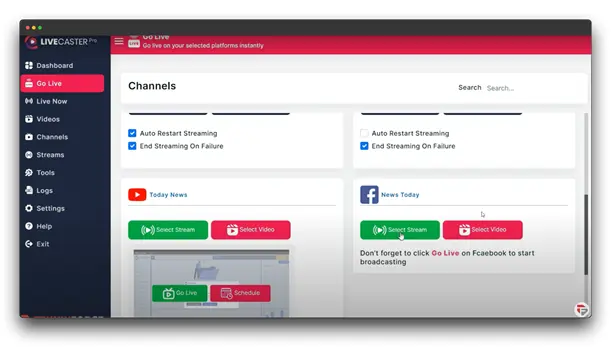
Step 11: After selecting the “Go Live” button, your streaming has begun.
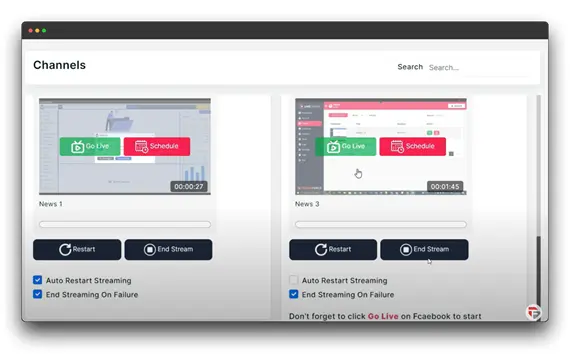
Step 12: Finally, click the go live button on your producer page. You can also open your producer page through the Facebook app using this button.
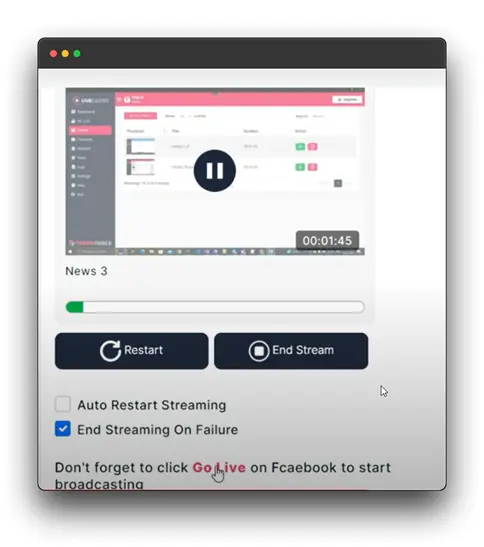
Step 13: Now, let us go to the producer page here in the left bar. Click on the “Go-Live” button
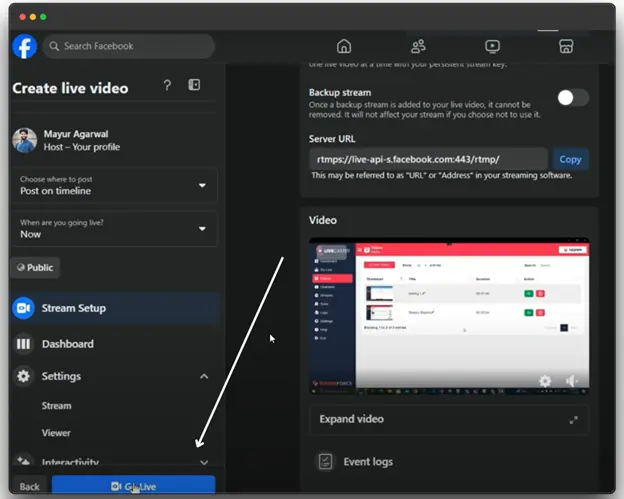
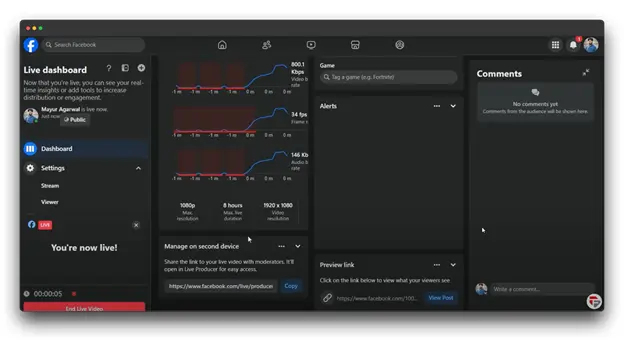
Step 14: In just a few seconds, you’re live! That’s how simple it is to go live on Facebook Live using Livecaster.
Best Practices for a Successful Facebook Live
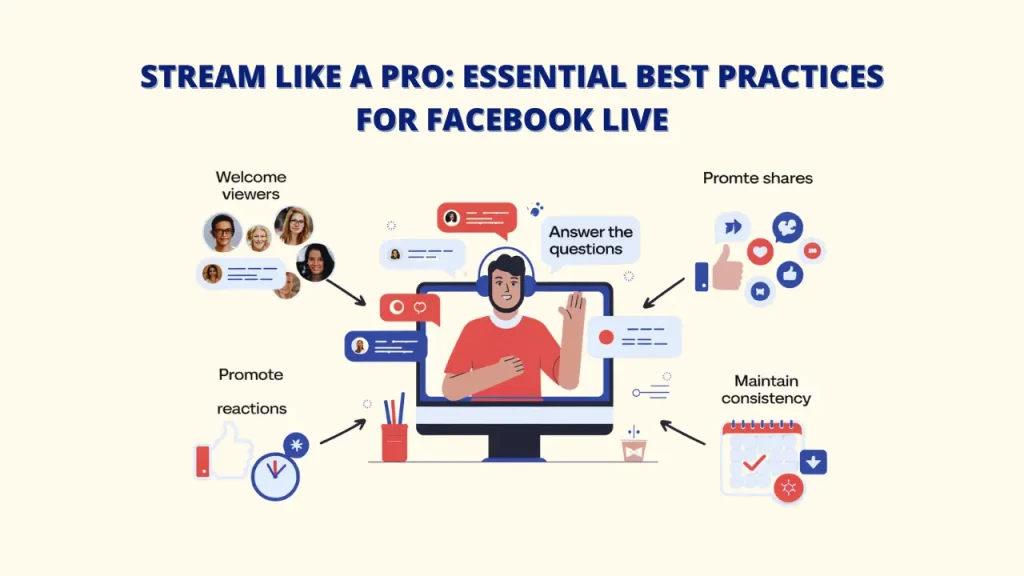
A. Welcome Viewers:
Start with a friendly greeting, mentioning viewers by name as they join. This personal touch makes the session feel more interactive.
- Acknowledge comments regularly
- Ask questions to boost engagement
- Add interactive segments
- Use names as people join
Livecaster also provides analytics to help you track your performance and improve your engagement.
B. Answer the questions:
Watch for comments and respond when possible. Addressing questions or feedback in real-time shows viewers that you’re attentive and involved.
C. Promote Shares and Reactions:
Ask viewers to like, share, or comment to increase your video’s reach. This activity signals to Facebook’s algorithm that your content is engaging, which can help you reach more people. Livecaster can amplify this reach, bringing in a wider audience.
D. Maintain Consistency:
Building an audience takes time, so consider hosting regular live sessions to keep followers engaged.
- Ensure a smooth content flow
- End with a clear call to action
- Keep your energy steady
- Begin with a strong hook
With Livecaster, you can schedule videos to go live automatically, even when you’re unavailable.
Engaging Your Audience During the Facebook Live Stream

1. Provide Value
Share unique tips, insights, or behind-the-scenes moments to keep viewers engaged and encourage them to return. You can:
- Launch special offers during the stream
- Give exclusive behind-the-scenes looks
With practical suggestions that viewers can use right away. With Livecaster, you can improve viewer interaction through live chat.
2. Fostering Engagement
Get your audience involved by asking questions, prompting them to comment, or using polls. Interaction helps build connections and keeps viewers engaged. Try:
- Setting up easy challenges for them to join
- Asking fun questions to learn about their experiences
With Livecaster, you can automate live video delivery with advanced streaming technology.
3. Metrics for Measuring Success
Watch important numbers like views, engagement rates, comments, and shares to see what resonates with your audience and how to improve. Key metrics include:
- Engagement rate
- Reactions and shares
Average viewing time Livecaster offers detailed analytics to monitor audience engagement and refine your strategy.
4. Greet new visitors.
Recognize and greet viewers as they enter. This simple gesture makes newcomers feel welcomed and part of the live session, setting a positive tone for engagement.
5. Use the Video Again
After the stream, save and share the replay. You can also:
- Create clips for Stories
- Turn insights into blog posts about your experiences using the Facebook app.
- Share the replay with timestamps for easy navigation
Use Livecaster to repurpose content, reach a larger audience, and increase engagement.
Conclusion
As you wrap up, you should now have a good understanding of how to go live on Facebook Live. Facebook Live gives you a unique way to connect with your audience on a deeper level.
By following these tips and consistently applying best practices, you’ll be ready to create live streams that attract viewers and help you reach your goals. Tools like Livecaster let you automate live streaming on platforms like Facebook, YouTube, Instagram, and more. By scheduling pre-recorded videos to go live, you can boost your organic reach, increase engagement, and bring more traffic to your content.
Remember: success on Facebook Live comes from being authentic, consistent, and genuinely engaging with your audience. Start with these basics and adjust your strategy based on feedback and insights.
Facebook Live offers endless possibilities to connect, share, and grow your online presence on Facebook using streaming software—so why wait? Go live today!
FAQs on How to Go Live on Facebook Live
1. Can anyone go live on Facebook?
A: Yes, anyone with a Facebook account can go live, either on their profile, a business page, or within a group.
2. Do you need any special equipment for Facebook Live?
A: You only need a smartphone or computer with a camera and microphone. However, good lighting and stable internet are recommended.
3. Is there a limit to how long a Facebook Live can be?
A: Currently, Facebook allows live streams up to eight hours long on desktop and up to four hours on mobile.
4. Can you schedule a Facebook Live in advance?
A: Yes, you can schedule up to one week in advance through Livecaster.
5. Can you monetize my Facebook Live sessions?
A: Yes, if you meet Facebook’s eligibility requirements, you can earn money from live streams through in-stream ads or fan support features.

