Curious about how to go live on Twitch? You’re in the right place!
Originally a gaming hub, Twitch streaming has transformed into a vibrant platform for creators of all kinds.

By 2023, Twitch streaming was drawing in over 35 million users each day, solidifying its spot as the go-to for live streaming across many interests. Today, fans tune in for everything from gaming and music to art and “In Real Life” (IRL) streams, making Twitch a top choice for streamers and viewers alike.
If you’re ready to dive into Twitch streaming, this guide has you covered. It’ll walk you through choosing a niche, planning engaging content, setting up your equipment, and maximizing Twitch’s features. And with fresh tools arriving in 2024, there’s never been a better time to jump in and share your passion with the world.
By the end, you’ll know how to start streaming, connect with viewers, and take your streams to the next level. So, let’s get started on your Twitch streaming journey!
Planning Your Twitch Streaming Content
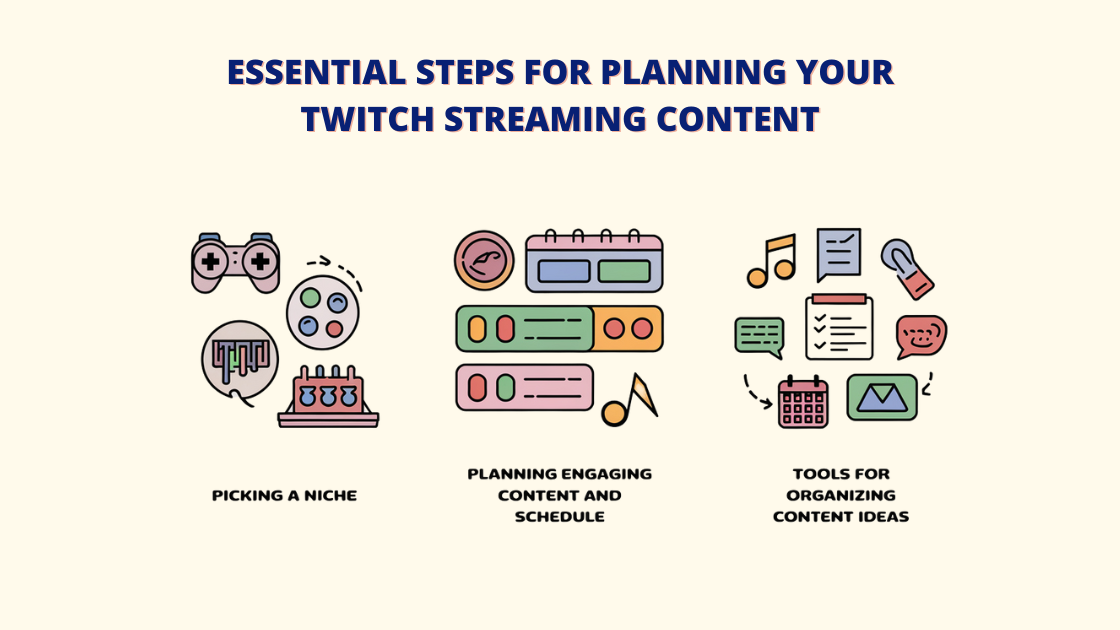
A. Picking a niche
Pick the type of content you want to share. While gaming is hugely popular, there are plenty of other choices like music, art, talk shows, and cooking, which can help you stand out. Think about what you enjoy and pick a focus that will connect with you and your audience.
- Gaming: The most popular option; try playing trending games or ones you’re skilled at.
- Just Chatting: Great for interactive chats and reactions.
- Creative: Share art, music, cooking, or any creative activity.
- Educational: Offer lessons, tutorials, or skill-building.
To increase engagement and reach a wider audience, Livecaster converts your recorded videos into live streams.
B. Planning Engaging Content and Stream Schedule
Being consistent is essential on Twitch. Set a regular streaming schedule so your followers know when to watch. Plan your content for each stream, aiming to entertain, engage, and provide value. Use tools like Livecaster to organize ideas and make scheduling easier.
- Set a steady weekly schedule.
- Plan different themes for different days.
- Use tools like Trello or Notion to keep content organized.
- Have backup content ready in case of tech issues.
C. Tools for Organizing Content Ideas
To manage streams and notify followers, Livecaster offers rescheduling and simultaneous broadcasts on multiple platforms, as well as scheduling tools like Google Calendar. These tools can assist you in organizing your content around peak times for your audience.
Choosing and Setting Up Your Twitch Streaming Equipment
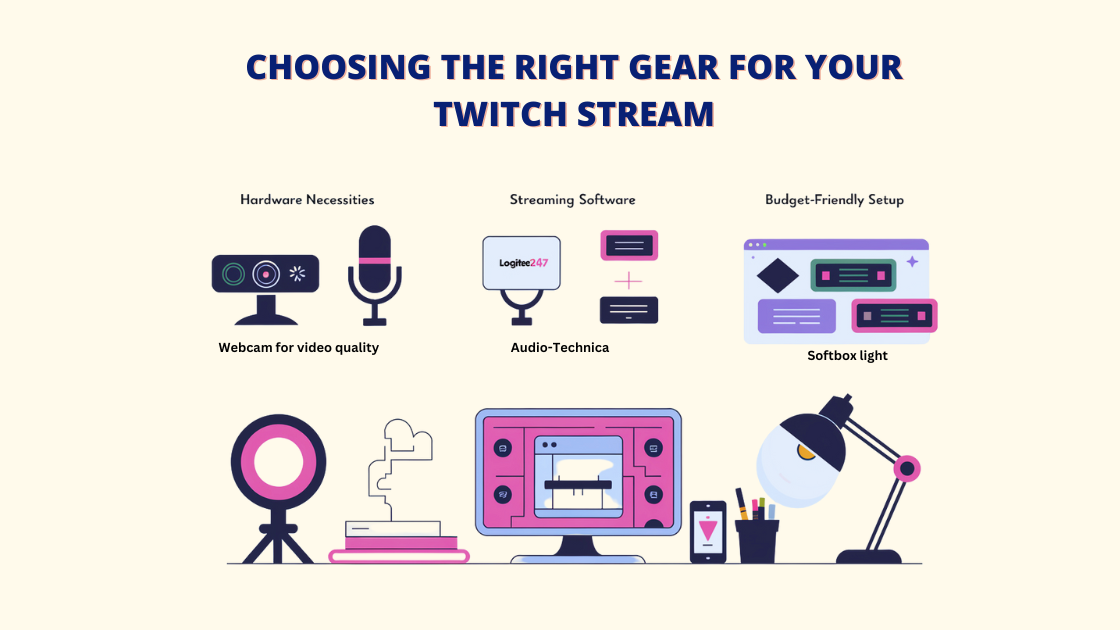
A. Hardware necessities
You will need the following essential tools to produce a high-quality stream:
- Webcam: A well-liked option that strikes a good balance between price and quality is the Logitech webcam.
- Microphone: Using a high-quality mic like the Audio-Technica AT2020 can greatly improve sound clarity, which is important for keeping viewers engaged.
- Lighting: A basic ring light or softbox light can improve video quality, especially for indoor streaming.
B. Software for streaming
- Livecaster24×7: This tool lets you stream pre-recorded videos across multiple social media platforms, helping you reach more people, boost engagement, and increase conversions.
- Stream Elements: This software allows you to create custom overlays, alerts, and interactive elements to make your stream more professional.
C. Budget-Friendly Option
You can still have a good-quality stream if you’re working with a limited budget. A reliable streaming software, a branded webcam, a decent microphone, and a basic desk lamp with a soft filter can give you a solid setup without spending too much.
With the help of the state-of-the-art Twitch streaming software application Livecaster, users can schedule and broadcast both live and pre-recorded videos.
Why Stream on Twitch?
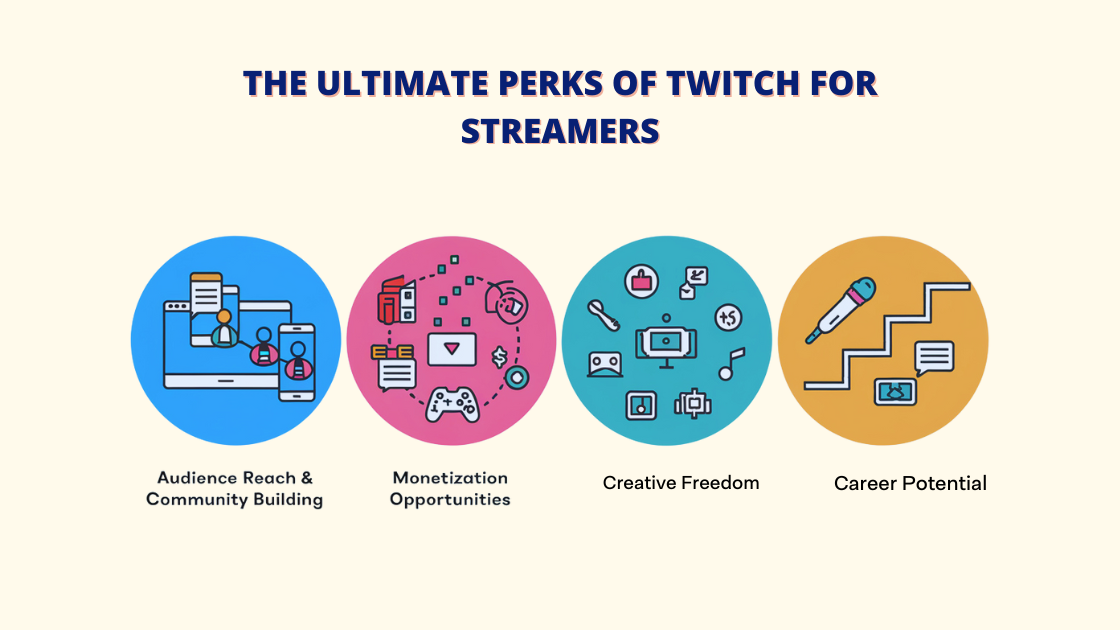
➕Reaching the audience and a community construction
Twitch has a large, active user base, making it easier to find viewers who enjoy similar interests. The platform is designed for building communities and allowing direct interaction with followers.
- Dedicated spaces for gaming and creative content
- Built-in tools to make money
- Stream on mobile
- Over 140 million active users each month
With tools like Livecaster, managing live streams is simple and engaging, helping you connect with your audience even more effectively.
➕ Monetization Opportunities
You can earn money on Twitch through subscriptions, donations, brand deals, and affiliate links. Twitch also offers the Partner Program, which gives creators more ways to earn.
- Subscriptions: Fans can subscribe for special benefits.
- Bits: Viewers can send you this virtual currency as a gift.
- Donations: Direct financial support from your audience.
- Brand Partnerships: Team up with brands to promote their products.
➕Creative Freedom
Twitch allows you to explore many different types of content, giving you the freedom to express your passions. You can try various formats like gaming, chatting, and creative projects, or combine them to make unique content.
Twitch offers a place to connect with an audience and build a community around what you love. Livecaster can help you share your streams across multiple platforms, reaching even more viewers.
➕Career Potential
Many Twitch streamers have turned their passion into a full-time career. With time and effort, Twitch offers growth opportunities for those who build a loyal audience. You may also automate your live videos, so you can stay connected with your followers even when you’re not online.
How to go Live on Twitch: A Step-by-Step Guide for Twitch Streaming
Step 1: The first thing you need to do is download Livecaster to your PC.
Step 2: In this video, I will show you how to go live on Twitch.
First, go to the Twitch website. After that, go to your profile or make a new one.

Step 3: Open Livecaster and create a Twitch channel for Twitch streaming by navigating to the channel section on the live streaming platform Livecaster.

Step 4: Select the Add channel button and enter the channel name you want to use for Twitch streaming.

Step 5: Then, for the RTMP URL, go to Google and search for “Twitch ingest servers,” and this is a list of all of the server URLs.

At this point, you can copy as you like.

Step 6: Paste the RTMP URL into Livecaster after returning to it.

Step 7: Next for the RTMP key, you need to go to Twitch on your profile.
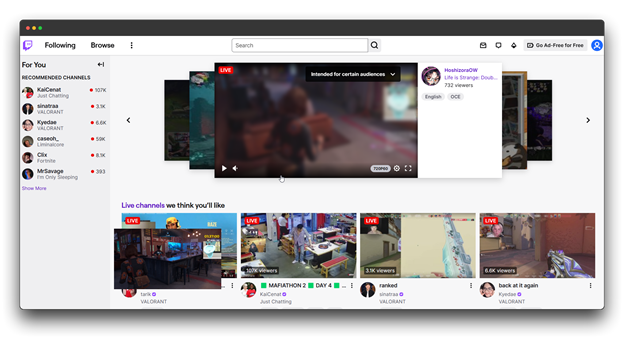
After that, navigate to your profile and select “settings.”

Step 8: In the settings, go to this page and select the option ‘stream’.
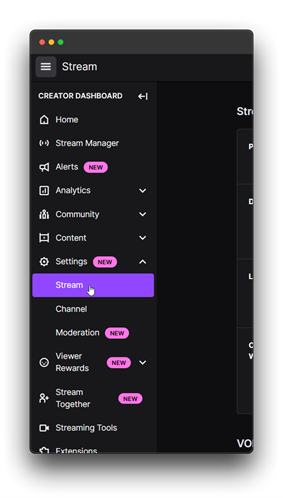
Step 9: On the stream page, you can see that the primary stream key has appeared; copy it for further use.

Step 10: Return to Livecaster and paste the key on the RTMP key.
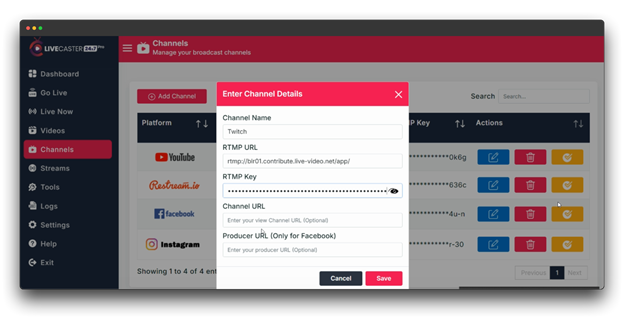
Step 11: You can now return to the producer’s page to find the channel URL where “Stream Manager” will be selected.
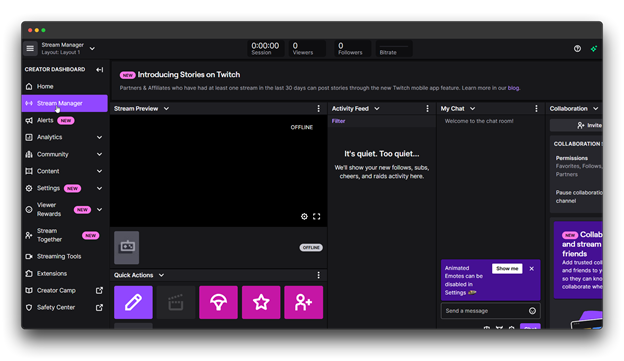
Step 12: At this point, you will copy the producer page link.
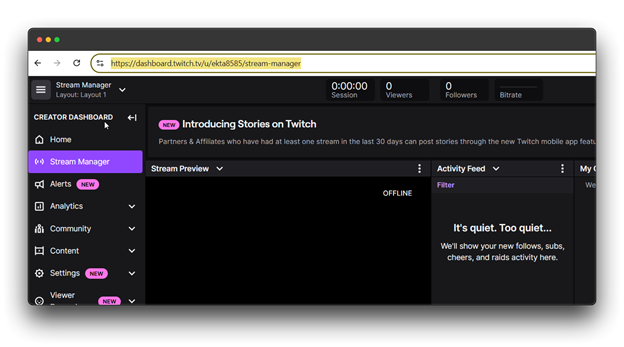
Simply copy and paste this link into this field.

and then finally click save.
Step 13 : Your Twitch channel has been successfully added, and you’re now ready to go live.

Step 14: You should click on the edit option for more options.

Step 15: Next for going live, you will go to the option on the dashboard Livecaster’s “Go-Live.”

Step 16: You will notice that your Twitch channel has appeared here. For your live broadcast, select the video or stream that you want to use.

Step 17: After that, you can choose any option; we will go with “Select video”. When you click, you will be presented with the option of going live with videos.

As you selected, “Go-Live” is now visible on the screen. The streaming begins when you click on it from the streaming software Livecaster.

Step 18: When you return to the Twitch platform, you will see in the stream manager section that live has been successfully launched.

Step 19: You can also check on LiveCaster on the dashboard, and if you click on Live-now, you will see that it has started.

In just a few seconds, you’re live on Twitch!
Engaging with Your Audience in Real-Time
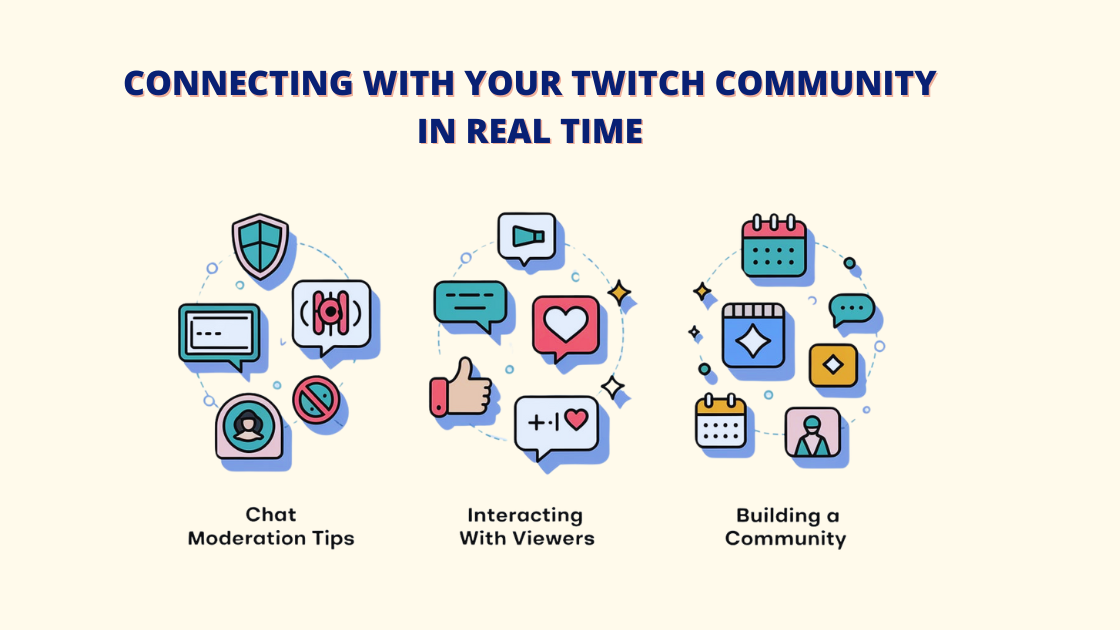
A. Tips on chat moderation
Keeping your chat safe and friendly can be achieved by using moderation tools. To control comments and enforce your rules, you can designate dependable followers as moderators.
- Set up filters to block inappropriate language
- Use chatbots like Nightbot or StreamElements
- Write clear chat rules
- Assign reliable moderators
By automating your live streaming with Livecaster, you can devote more time to producing high-quality content.
B. Interaction with viewers
Interacting with viewers in the chat helps build strong connections. Respond to messages, welcome new followers, and use interactive features like polls to keep the experience engaging.
Welcome new viewers
- Run polls and predictions
- Host channel raids to connect with other streamers
- Set up rewards for channel points on your Twitch account.
C. Establishing a community
Keeping a consistent streaming schedule and connecting with your community on platforms like Discord can boost loyalty and help expand your channel. Another excellent strategy to raise your profile is to work with other streamers.
Livecaster’s automatic recovery features make live streaming easy and are great for beginners.
Twitch Streaming Tips for 2024

A. Optimizing your stream to be effective
A strong Twitch channel combines great tech quality with engaging content. For a good viewer experience, focus on clear audio—investing in a quality microphone often matters more than video.
🎯Top Tips for Stream Quality:
- Test your settings before each stream
- Use two monitors if you can
- Set up smooth scene transitions
- Add alerts for new followers and subscribers
Livecaster is a flexible platform that integrates with popular sites, letting you run live streams continuously.
B. Establishing a solid brand identity
Your brand goes beyond just visuals. Create a style that shows off your personality and content. This can include overlays, emotes, badges, and your approach to interacting with fans.
🎨 Tips on branding your Twitch account effectively:
- Design emotes that capture inside jokes in your community
- On all platforms, use the same fonts and colors.
- Develop a unique streaming style
- Make a fun channel trailer
C. Networking and Collaboration Strategies
Growing on Twitch requires establishing relationships with other streamers. It should be genuine and advantageous for both parties when networking. Like Livecaster, which lets you share pre-recorded content across platforms, collaboration can boost visibility.
🤝 Ways to Network:
- Join streamer groups on Discord
- Participate in raid trains
- Support other streamers by engaging with their content
- Create joint events or competitions
D. Trending Techniques for 2024
Stay relevant by adding new trends to your stream.
📈 Trendy Ideas:
- Share short-form clips from TikTok or YouTube Shorts
- Experiment with VR streaming
- Use interactive overlays to enhance viewer engagement on Twitch stream.
- Stream across multiple platforms at once
For YouTubers and vloggers in particular, Livecaster makes scheduling and automating streams simple.
E. Building and Nurturing Your Community
Your community is your most important asset. Make your channel a welcoming place where viewers feel appreciated and connected.
🌟 Community-Building Tips:
- Set up a welcoming Discord server
- Host regular events for your fans
- Recognize and reward loyal viewers
Users can greatly increase audience engagement with Livecaster by utilizing the power of pre-recorded content and live streaming. It converts your recorded videos into live streams helping you reach a wider audience by utilizing pre-existing content.
Conclusion
Launching a Twitch channel is an amazing way to show your skills, connect with a wide audience, and even start a possible career path. With Twitch’s large, active community, anyone who loves gaming, art, music, or live conversations can find their own space and follow on the platform.
By picking a niche you’re passionate about, getting the right gear, and learning to use streaming software, you can confidently begin your first live stream. Tools like Livecaster make this process even easier, allowing you to schedule and broadcast pre-recorded content as live videos across many platforms, like YouTube, Facebook, TikTok, Instagram, Amazon, and Twitch. This way, you can reach more people and boost your online presence.
Consistent engagement, a regular streaming schedule, and a friendly community are essential for lasting success. This guide has covered the basics—from picking your niche to real-time viewer interaction. Enjoy the journey, experiment, and adapt to feedback. Growth takes time, but every stream brings you closer to a loyal fan base and your streaming goals. Starting a Twitch channel is both exciting and rewarding. With the right setup and consistent effort, you can build a thriving community.
So take the plunge, hit “Go Live,” and begin your Twitch streaming journey today, whatever you’re waiting for!
FAQs
1. Does Twitch streaming require a powerful computer?
Ans: No, you don’t need a high-end computer to start streaming. Many successful streamers use mid-range setups with adjusted settings. Tools like Livecaster can help you broadcast single videos or playlists smoothly to keep viewers interested.
2. What is the best streaming app for new users of Twitch?
Ans: Livecaster and Streamlabs OBS are both effective and user-friendly options for new streamers. Livecaster is especially helpful for beginners as it includes built-in alerts and widgets.
3. How can you make my stream more engaging for viewers?
Ans: Interacting with your audience is key. Call viewers by name, respond to their questions, and use features like interactive overlays and polls. Livecaster can boost reach by maximizing engagement and bringing more viewers through live video.
4. What is the most effective way to promote my Twitch channel?
Ans: Promote by sharing clips on social media, using relevant hashtags, and teaming up with other streamers. Consistent streaming and viewer engagement help grow your audience. Livecaster also lets you stream across multiple platforms at once, reaching a wider audience.

